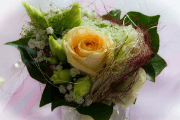
DIY Wedding Ideas

Here are seven DIY wedding ideas that are easy to make and will add a personalised feel to your big day:
DIY: Strung Heart Garland
Buy a heart punch, some coloured craft paper, glue and string. Stamp out hearts for the length of your bunting. Each section of the bunting will use two hearts. On your length of string, lay one heart down (backside up), centre a small line of glue, then quickly layer the string on top and another heart (backside down). Continue the process along the string. Once all the hearts are laid and dried, fold the top and bottom hearts away from one another for a pretty 3D effect.
DIY: Home-made Candle Favours
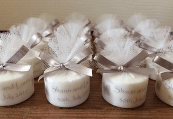
Candles favours are easy to make with microwaveable soy wax and a package of candle wicks, both available at craft stores.
Choose an interesting container for your candle, ideas include miniature clay pots or teacups, and cut the wicks to fit the depth of the container. To keep the wick straight and centred in the vessel, loosely tie the top around a wooden stick long enough to rest on top of the container. Melt the soy wax flakes and add a few drops of lavender oil.
Pour the wax into the container and leave to cool. Decorate the pots. Some ideas include simple gift tags or cut sprigs of dried lavender to tie around each jar.
DIY: Pretty Painted Glass Centrepieces
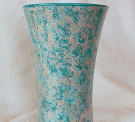
Collect glass vases of all different sizes for contrast on your wedding tables and buy a couple of water-based paints in your chosen colours.
In a large basin, mix 4 cups paint with 1 cup water, stir well. Tape off your vases to the level you would like the paint to reach. Vary the levels on your vases for a pretty aesthetic. Dip the vases into the paint to cover the entire bottom portion. Turn the vases over on a dry cloth, and allow at least 24 hours dry time.
Peel off all tape and using a damp paper towel, remove any residue paint. Leave your edge straight for a clean look or make a jagged edge for added effect. Set your vases somewhere dry and let the paint set for another 48 hours. Fill with a few stems and group for pretty table arrangements.
DIY: Rustic Wedding Signs
Use reclaimed wood to make signs at your rustic wedding. This DIY task requires no artistic skill as you write on the wood. Here are some ideas for your wedding signs:
A signpost to the ceremony that says: "I Do's"
Seating Arrangements: “Today two families became one, choose a seat, not a side.”
Reception: different signposts to indicate location for drinks, photo booth, games etc.
Bride and groom: hang panels on the back of the couple’s chair
DIY: Photo Booth
One of our favourite wedding ideas will provide you with memories to last a lifetime. You will need a digital point-and-shoot camera, camera tripod, a remote shutter release, a backdrop and props.
Set up in an area that is easily accessible, but won’t get crowded in the reception. Place the camera, with the flash turned on, on a tripod at eye level. Connect a remote shutter release so guests can take their own photos. Hang a fabric backdrop and use props like scarves, hats, glasses, frames etc. Provide chalkboards or dry erase boards for guests to write messages to you.
DIY: Wedding Wreaths
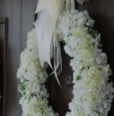
Wild green wreaths are one of the ideas for decorating church doors or use as pew markers. You will need spool wire, floral tape, clippers, ribbon and about fifteen stems of greenery like rosemary, bay and boxwood.
Create a circle of your chosen size with the spool wire and double it over several times. Cover the circle in floral tape. Cut small pieces of your greenery and remove leaves from the bottom inch of the stem. Secure each piece with wire. Overlap the stems to cover all wires. You may need to fill in with a few extra pieces. Hang with ribbon.
DIY: Embossed favour boxes
Here we describe DIY embossed favours, but you can use the same tools and ideas to emboss your wedding invitations, menus, programmes or save the dates.
You need a craft heater, available from most craft stores; a jar of embossing powder, which will last you through hundreds of favours boxes and other projects; a stamp in the words of your choice and a white stamp pad.
To emboss favour boxes, first stamp the box with a very wet stamp. Once the favour box is stamped sprinkle a generous amount of embossing powder on top of it. Use the heating tool to dry and heat the embossed word on your box top. Tap the extra powder onto a sheet of paper for re-use.

